Shortcut
Menu - Mouse Right-Click
The shortcut menu appears when you click the right mouse button (right-click).
Your module
includes different shortcut menus for different purposes. For
example, most fields contain a shortcut menu for manipulating the text
in the field. This
topic describes the most commonly used shortcut menus.
Tip: Some
modules may have additional shortcut menus for functions unique to the
module.
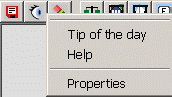
Toolbar Shortcut
Menu
To display the Toolbar shortcut menu, position
the pointer anywhere on the Toolbar, and then right-click.
Tip: To
see information about the Toolbar shortcut menu option, click More.
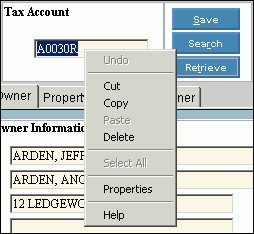
Field-Level
Shortcut Menu
To display the field-level shortcut menu, left-click in any field box,
and then right-click.
Tip: To
see information about the Field Level shortcut menu options, click More.
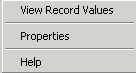
Window-Level
Shortcut Menu
To display the Window-Level shortcut menu, position the pointer in a
blank area of the window, and then right-click.
Tip: To
see information about the Window-Level shortcut menu options, click More.
Search List
Shortcut Menu
To display the Search List shortcut menu, position
the pointer anywhere in the list of records displayed in the Search window,
and then right-click.
Tip: To
see information about the Search List shortcut menu options, click More.
WebHelp
Topic Shortcut Menu
To display the WebHelp
shortcut menu, position the pointer anywhere in the Viewing
Pane area (on the right) or the Navigation
Pane (on the left), and then right-click.
Tips:
You will
see the standard shortcut menu for the Internet browser,
such as Windows Explorer.
The command
you will probably find most useful is Print,
used for printing a topic.
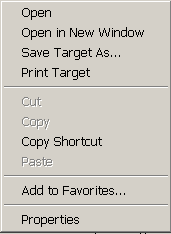
Example:
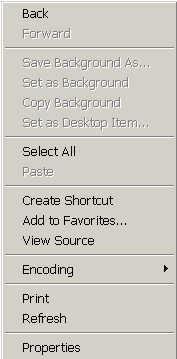
WebHelp
Hyperlink Shortcut Menu
To display the Hyperlink shortcut menu, position the pointer on top
of a hyperlink in WebHelp,
and then right-click.
Tips:
You will
see the standard hyperlink
shortcut menu for the Internet browser,
such as Windows Explorer.
The command
you will probably find most useful is Add
to Favorites.
Directions: To
add the Glossary of Terms to your
favorites list:
1. Locate
the topic for the Glossary of Terms in the Navigation
Pane.
2. To
display the shortcut menu, right-click the topic name.
3. To
add the topic to your Windows favorites list, click Add
to Favorites.
Tip: When
you display the topic from your Favorites menu, click Show
Table of Contents  to see the WebHelp menu
on the left.
to see the WebHelp menu
on the left.
Example: