 from the Desktop.
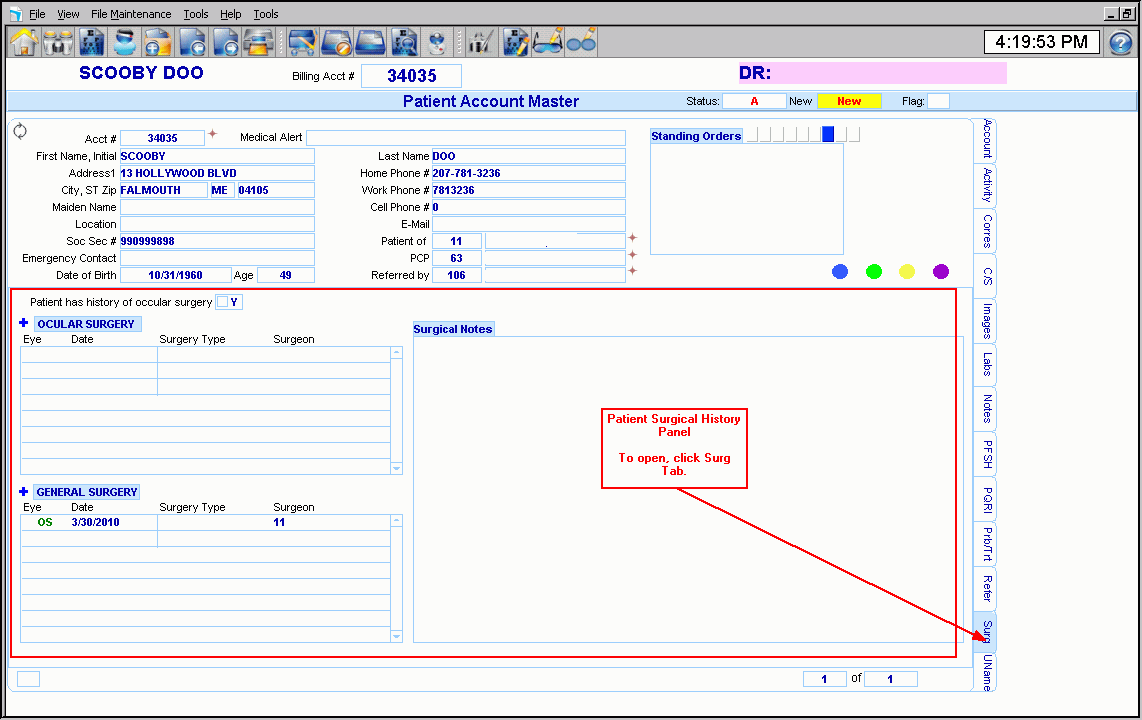
Patient Account Master - Surgical History Panel
Use the Surgical History Tab to review the patient's history of surgeries. To drill down to the more surgical details click the green arrows. You can also dictate and store audio notes for playback at a future date.. The table following the window example describes the Surgical History Panel for Patient Account Master.
The Action Button Options on the right are:
1. Add General: Adds a new General Surgery record. Then you fill in the date, Surgery Type, Surgeon and drill down if necessary to add more information.
2. Add Ocular: Adds a new Ocular Surgery record. Then you fill in the date, Surgery Type, Surgeon and drill down if necessary to add more information.
3. Search: Goes to the Patient Search routine. This is usually to start a new encounter.
FILE NAME: Patient_Account_Master_-_Surgical_History_Panel.htm
For additional information, click More.
Tips:
TextTextText Enter advanced information here, if applicable.
Tip: For more information about working with data in fields, see the Data Entry Guidelines.
Tip: For more information about working with data in fields, see the Data Entry Guidelines.
Directions:
1. Click to select the patient name listed on the EPM Desktop.
2. Or,
to search for the appropriate patient, click Search
Accounts  from the Desktop.
Click Account and enter the patient account number, then press [ENTER].
Or, click Last Name or First Name and enter the patient name, then press [ENTER].
Click
Select  to the left
of the desired patient.
3. Click Surg Tab.
Patient Account Master - Surgical History Panel Example:

|
YourSectionName Area Prompts Tip: To see more information about a field, click the hyperlink for the field name. |
|
|
YourFieldName withlink |
TextTextText. (up to 6 characters) (7.2 numeric) (mmddccyy - slashes and century optional) DeleteOne |
|
|
To update the new or changed information, click Save or press [ENTER]. Keyboard shortcut: [ALT + s] |
|
To avoid losing data, you must save new or changed records. | |
|
|
To view all of the existing YourRecordNames, click Search. From the Search list you can select the record to change or delete. Keyboard shortcut: [ALT + r] |
|
|
To display an existing YourRecordName, enter the KeyFieldCodeID and click Retrieve, or press [ENTER]. Keyboard shortcut: [ALT + t] Author: The Shortcut and button image are not the same in all modules. |
|
YourFieldName withlink |
TextTextText. (up to 6 characters) (7.2 numeric) (mmddccyy - slashes and century optional) DeleteOne Author: You do not need to list the format for predefined codes in drop-down lists. |