Click Reporting from the Menu Bar.
Click Management Reports Designer.
Click
Column Design  .
.
Management Reports Designer - Column Design Tab
Use the Management Reports Designer - Column Design Tab to control the kinds of column data to be included on the report. For example, one financial statement compares current period and year-to-date information for this year with last year’s information. On another, it compares current year-to-date and last year’s information with the current budget and last year’s budget. Column design options can allow calculations of variances in flat dollar amounts and percentages. You can define any number of column formats and save them as unique format IDs. The table following the window example describes the Column Design Tab for Management Reports Designer.
Tip: For more information about working with data in fields, see the Data Entry Guidelines.
Directions:
To display the Management Reports Designer - Report Specifications Tab:
Click Reporting from the Menu Bar.
Click Management Reports Designer.
Click
Column Design .
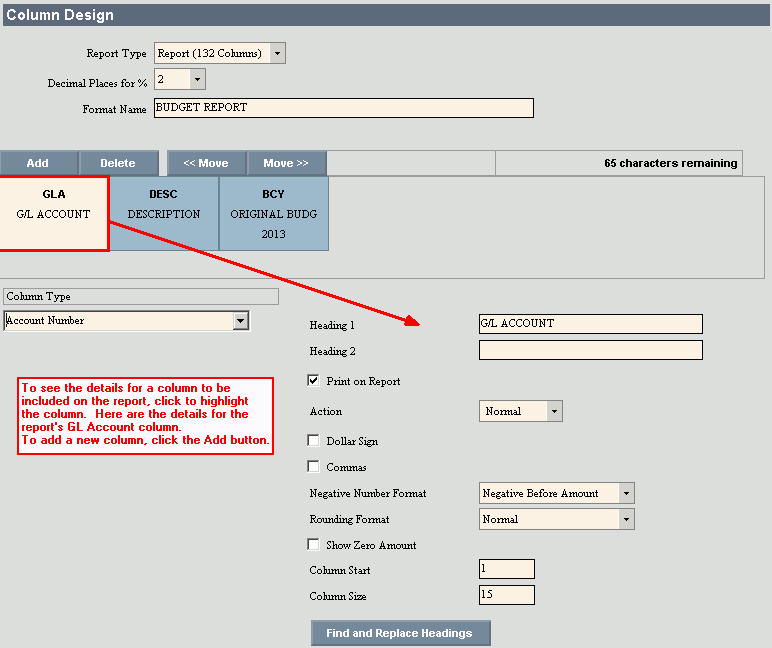
Column Design Tab of Management Reports Designer Window Example:
|
Management Reports Designer – Column Design Prompts Tip: To see more information about a field, click the hyperlink for the field name. |
|
|
Report Type |
The Report Type designates the width of the report and controls the number of columns to print on the report. To display the drop-down list press [space bar] and then click a choice:
|
|
|
To update the new or changed information, click Save. |
|
To avoid losing data, you must save. | |
|
Decimal Places for % |
Enter the number of digits to display after the decimal point for percentage values. Choices are: 0, 1, or 2 |
|
Format Name |
Displays from the Report Specifications for your reference. Or, enter a name to describe the column layout. You can use the same format name for many reports. For example, you can use the format name BUDGET for every department’s budget report. Tip: Above is a sample of a BUDGET column format. |
|
|
To display the information for a specific column, click on the desired column tab. In the example above, the first column’s information is displayed. |
|
|
To add a new column, click Add and the column is added to the end of the report. Tip: To move the column to the desired position, use the move buttons. |
|
Column Details |
|
|
Column Type |
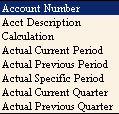
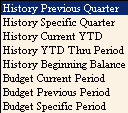
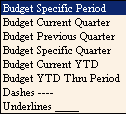
To specify a column type, click a choice in the drop-down list. The following are the available options:
|
|
Period |
If you select a Column Type of Actual, Period displays. Enter the period to report. |
|
Historical Year |
If you select a Column Type of Historical, Historical Year displays. Enter the Historical Year to report in this column. |
|
Budget Name |
If you select a Column Type of Budget, Budget Name displays. Enter the Budget Name to report in this column. |
|
Calculation |
If you select a Column Type of Calculation, Calculation displays to allow you to create variance calculations to be performed between columns and may be printed on the report. You can calculate totals or differences for any or all columns, to show such things as variance amounts from year-to-year or a variance percentage from budget to actual. Calculation amounts can be flat amounts or percentage variances. The following characters may be used in a calculation:
Calculations are calculated from left to right, unless parentheses are used. Use double parentheses to further segregate operations. Example: (#2 + #3) + ((#2 + #3) * (10 / 100)) In this example, a total of columns 2 and 3 is being calculated, (#2 + #3), and then an additional 10% is being added to that total, + ((#2 + #3) * (10 / 100)). |
|
Heading 1 |
Enter the first heading line that describes the column. |
|
Heading 2 |
Enter a second column heading line to display below the first line on the report, if desired. |
|
Print on Rpt |
To print this column on the report, click to select Print on Rpt. This is handy if you need a calculation, but do not need the calculated value to print. Tip: Only the printed columns are deducted from the number of spaces used on the report. |
|
Action |
If a column is being set up for any of the Financial, Historical or Budgetary Type options, it may be displayed as a total or as a percent of a line accumulator. Choices include:
Note: A % will only display if the line is also designated as a percent in the Line Design Format. |
|
Dollar Sign |
To include a dollar sign ($) in front of all amounts in this column, click to select this box. |
|
Commas |
To use commas to format the number display, click to select this box. |
|
Negative Number Format |
To indicate the negative number format, click in the box to display the format choices. Choices are:
|
|
Rounding Format |
To specify a rounding format for the column value, click a choice in the drop-down list. Choices include:
|
|
Show Zero Amount |
To include zero amounts on the report, click to select this box. To omit zero amounts from the report, please leave blank. |
|
Column Start |
The column start position displays for your reference. To move the column to a different position, see Move Column Design Actions below. |
|
Column Size |
The column size displays for your reference and cannot be edited. |
|
Column Design Actions The Column Design Action buttons are located above the columns. |
|
|
Edit |
To edit an existing column: 1. Click to highlight the column to edit and the detail displays. 2. Click the field to change and enter the new value. 3. Click Save to save your changes. |
|
|
To delete a column: 1. Click to highlight the column to delete. 2. Click Delete located above the column design formats. The column is deleted. Important: Do not click Delete located near the top of the window. That Delete will delete the entire Management Report. |
|
|
To move a column: 1. Click to highlight the column to move. 2. To move the column to the right, click Move>>. 3. To move the column to the left, click <<Move. 4. Continue clicking Move until the column is positioned in the desired position. |
|
|
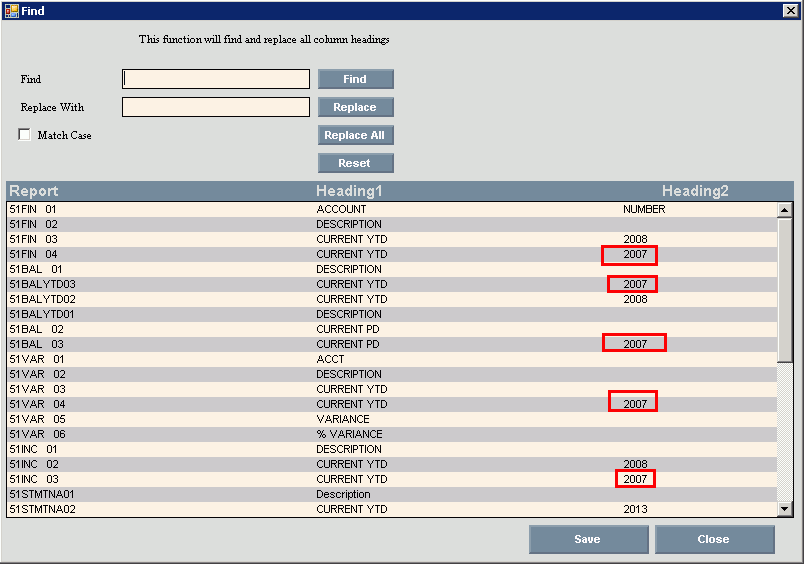
You can easily change column headings individually or as a group. If the current fiscal year is in your report headings, you can use the Find and Replace Headings to edit them to the new calendar year after you have completed your year-end. Note: For directions, see Find and Replace Headings. |
|
|
To save the format changes, click Save. |
|
To avoid losing data, you must save. | |
|
|
To change and replace column headings, click Find and Replace Headings. |
|
After clicking, the following window displays:
|
|
|
|
1. In the example above, if all of the fiscal year 07 headings should now be changed to the fiscal year 08, then enter 07 in the Find field and click Find. The system checks the Heading fields for a match and highlight the first line that matches. Tip: If you want to match the case (upper or lower) then check the Match Case box. Otherwise, Find is NOT case sensitive. 2. Enter 08 in the Replace With field and: 3. Click
Replace to only change the line
highlighted 4. The replacements will display on the screen. 5. If the change is correct, click Save and the column design screen will
re-display. 6. To exit from this window and return to the Report Specification window, click Close. |